For a large portion of my pattern I used the cardboard cut outs to get a basic shape. For example; the sleeve, jacket, hood and bodice lining. And I created the skirt using one piece of fabric. However, the bodice was a bit more tricky.
THE SLEEVE
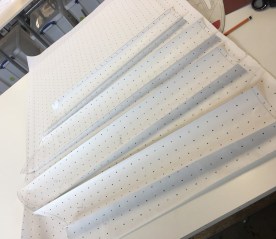
- To achieve a fuller sleeve I split the sleeve up into 4 equal pieces and then stuck the pieces back down making sure the top part remained together (so it would still fit into the armhole perfectly) but the bottom was spread apart. I ensured the spaces between were exactly the same measurement – 6cm. I knew this worked well as I did a practice before making the real thing.
THE HOOD
- I used the basic card pattern pieces to create the hood but I had to alter it slightly. I preferred a center seem rather than a middle panel, so it would line up with the back of the jacket. This meant I had to halve the panel and add it to the hood, which I then cut out four times as two pieces were for the lining.

THE JACKET
- The jacket bodice was pretty simple to create as I just needed to give some volume to the bottom. This meant that when I added the ribbed edge it would give an interesting shape that puffed out and came in at the waist. So I carefully drew a line that came across from the sleeve and angled down to meet a straight line coming from the bottom. I cut along this line and moved it, just like I did with the sleeve, to allow for a longer hem that would be gathered.
- I then used the pattern to make a smaller section for the lining. I traced this onto a new piece of paper so I was able to cut it out and pin it onto the fabric.

THE SKIRT
- The skirt was made to be simple as it was just a really long piece of fabric that I gathered along the waistline in multiple strips to give a ruffled effect and a exaggerated silhouette. I made the mistake of not putting elasticated thread on top and in the bobbin which meant it didn’t stretch as much as I’d hoped it would. I would have done this again if I had the time but the gathering of each line was quite time consuming and I only realised after it was too late. It was supposed to be something you could easily slip on but ended up being much to small.


THE BODICE
- To create the part of the bodice under the bust I had to work from the mannequin as I wanted to achieve a perfect fitted shape inspired by corsets. I used a black and white tape that stuck to the mannequin perfectly but was easy to move around, I really enjoyed playing around with it as I’ve never used it before. From there I quite awkwardly pressed the paper flat onto the mannequin to try and trace each shape individually and then added a 1cm seam allowance around each. In keeping with the grain I used a small piece of scrap fabric to cut out these pieces to reduce the waste. This came together rather well but I did have to take a few of the seams in slightly as my garment didn’t turn out as fitted as I had hoped.

THE RUFFLES
- This part proved to be much more difficult than I had anticipated. It was a challenge gathering the part under the bust equally and trying to match it with the bodice underneath, especially when the fabric kept slipping everywhere because it was so silky. But then it came to matching the ruffles with the lining, it was simple when I was pinning it to the mannequin! I had to make sure the gathers remained straight and lined up with the top half of the gathers as well as not being too baggy. I tried tacking it to keep it all in place, but this didn’t work, so I covered it in pins and hoped for the best. I used lining on the bodice as I felt it would help keep the ruffles in a sort of order.